m (Jkuehn moved page Lesson 6 to Lesson 6 Tut3 without leaving a redirect) |
Revision as of 22:39, 12 January 2013
Template:Hauptüberschrift Template:NavigationTop-Tut3 {{#tree:id=dmxc3|openlevels=1|root=DMXC 3 lessons|
- preamble
- lesson 1: Installation and configuration
- lesson 2: The GUI panel concept
- lesson 3: Creating and patching fixtures
- lesson 4: The live view panel
- lesson 5: Setting properties with property panels
- lesson 6: Output plugins
- lesson 7: Summery and details - Setting
- lesson 8: Scenes (cues) and scene lists
- lesson 9: Fanning, chasers and other effects
- lesson 10: The programmer view
- lesson 11: Trigger concepts
- lesson 12: Editing scenes and scenelists
- lesson 13: Presets
- lesson 14: Summary and details - Programming
- lesson 15: Working with parallel scene lists
- lesson 16: Softpult
- lesson 17: Artnet
- lesson 18: Multi-media: Beamer tool, Matrix etc.
- lesson 19: Other clients and plugins (Android, iOS, ...
- lesson 20: Create new device definitions
- lesson 21: free topic
- lesson 22: Hints for testers and test reporting
- appendix1: Summary of commands ans shortcuts
- appendix2: Kernel menu tree
}}
Overview
In order to control your lamps you need to send out "real" DMX signals to your universes. In this lesson we explain how to configure your output devices.
Lecture 6: Configuring the output plugins
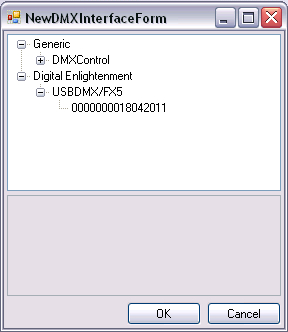
In the menue "settings" you can find the panel DMX interfaces. There you can select your DMX transmitter/sender by choosing it in the new window that appears when pressing button Add interfaces.
Template:Bild mit Unterschrift
| |
In the current beta version only a subset of DMX Interfaces is supported (compared to DMXControl 2). But this is no blocking point for testing the software, if you are an owner of a different interface. On one hand the software also works without DMX-Interface, on the other hand you can use the Artnet-Interface to connect to a light control software supporting your interface, e.g. DMXControl 2.12. See Lesson 24. |
Then, the interface has to be configured on "Advanced Interface Settings". Here you can make fine tuning and set the configuration settings that are supported by your DMX transmitter. In the shown case you can modify e.g. the break time if the DMX receiver in one of your lamps requires a higher value. In "Set Interface Mode" you can choose a mode that corresponds to your application. In Figure 2, the mode is still set to 0 - Standby. In order that the DE or fx5 interface outputs something, you can select Mode 2 - PC Out -> select DMX Out.
Template:Bild mit Unterschrift
Interfaces that support more than one DMX universe (such as the visualization tool 3D Easy View), obtain a line in the table for each DMX Universe. Therefore e.g. 3D EasyView gets four lines.
The field Port indicates the corresponding input or output of the interface. In the columns DMX Out Address and DMX-In Address you can assign a a port to a DMX Universe by a double click.
The entry must be constructed in accordance with the scheme:
Universe.DMX start channel
DMXControl 3 supports 16 DMX universes (Universe Universe 1 to 16) with each 512 channels (channel 1 to channel 512).
If it is intended that the DE or fx5 interface for example has to send all channel values from channel 83-512 in Universe 4 and DMXControl should use received DMX values via DMX in on Universe 6, you have to enter 4.83 within the appropriate field DMX-out address and 6.1 in DMX-In Address.
On some interfaces (such as the Nicolaudie SIUDI) a port can only act either as a DMX-in or as DMX out. In this case, check boxes that appear in columns DMX-Out Enabled and DMX-In Enabled, to adjust the respective wanted behavior.
| |
There are DMX devices that have problems with the timing. These devices respond completely wrong or only partially to transmitted DMX values. A change in the values "Break Time" may remedy the situation. Just try it. You can adjust these values also under "Advanced Interface Settings". |
Excercise
- Activate and configure your DMX transmitter
- Configure an ArtNet Interface ("Artistic Licence")
- Set the Output-Universe of Port2 of ArtNet-Interfaces to channel 65 of third universe
- What happens by inserting 2.513 or 17.1?
Certificate
I have understood the topics of this lecture and want to continue with next course: Lesson 7

