Template:Hauptüberschrift Template:NavigationTop-Tut3 {{#tree:id=dmxc3|openlevels=1|root=DMXC 3 lessons|
- preamble
- lesson 1: Installation and configuration
- lesson 2: The GUI panel concept
- lesson 3: Creating and patching fixtures
- lesson 4: The live view panel
- lesson 5: Setting properties with property panels
- lesson 6: Output plugins
- lesson 7: Summery and details - Setting
- lesson 8: Scenes (cues) and scene lists
- lesson 9: Fanning, chasers and other effects
- lesson 10: The programmer view
- lesson 11: Trigger concepts
- lesson 12: Editing scenes and scenelists
- lesson 13: Presets
- lesson 14: Summary and details - Programming
- lesson 15: Working with parallel scene lists
- lesson 16: Softpult
- lesson 17: Artnet
- lesson 18: Multi-media: Beamer tool, Matrix etc.
- lesson 19: Other clients and plugins (Android, iOS, ...
- lesson 20: Create new device definitions
- lesson 21: free topic
- lesson 22: Hints for testers and test reporting
- appendix1: Summary of commands ans shortcuts
- appendix2: Kernel menu tree
}}
Overview
Scenes (cues) are the most important elements of your show. Here we will explain the powerful scene concept of DMXControl 3. The terms "cue" and "scene" are used as synonym words.
Lecture 8: Scenes (cues) and scene lists
Now the real work begins - we will create our first cue in DMXControl 3! All RGB lights will shine green.
- We go to the Stage View
- We select the "Generic RGB PAR Group" (or choose all RGB light with one of the other methods)
- The intensity of the dimmer panel is pulled or press the "Lumos" button
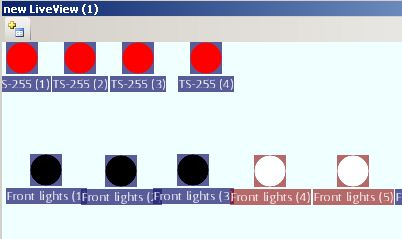
- In the color panel select "green". The 8 headlights in the Stage View should now respond accordingly (see figure)
Template:Bild mit Unterschrift
- On the left click on "Add new cue"
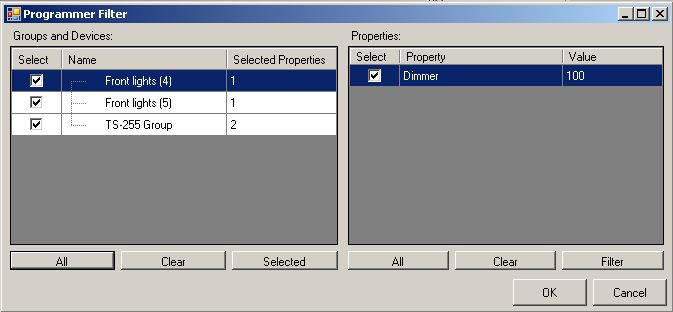
- It opens a new window called "Programmer filter" which we will explain in Chapter 10. For now press OK.
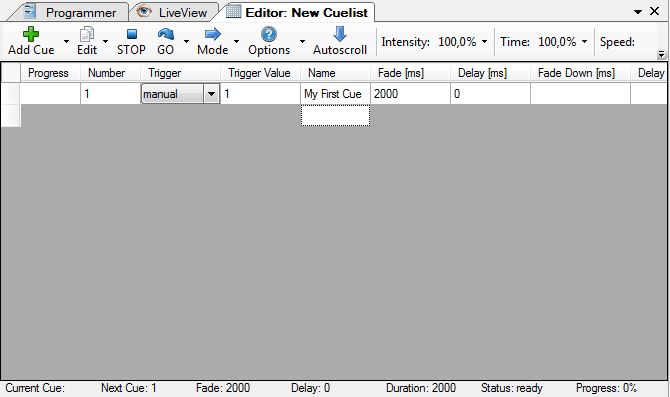
- Because we do not have any cue list yet, a new one will be created now automatically. This is displayed in a new panel.
- Here we rename the cue in the Name field to "My First Cue".
Template:Bild mit Unterschrift
Each scene (cue) needs a "host container" - that's a scenelist (cuelist). New cuelists can be created clicking the small triangle besides the "Add new cue" button and there follow the drop. Then again press "Add new cue!".
You can open this new cue list with a double click on the object in the project explorer or using the context menu item "open" (or double click). In the tabular list you can adjust the individual parameters of the cue.
| |
The name of the cue should always be changed so that you can remember later quickly what the cue includes, what the reason is and wich target this cue has (e.g., "First scene", "Start cue", "ML red", etc.). There is even a comment box at the far right side in the scene list. |
The life cycle of a cue is as following:
Template:Bild mit Unterschrift
A cue waits at first for its trigger point, see Lesson 11. Then the delay-time becomes relevant if it is defined. Finally a fade-in time can be specified where the cue is faded in (increasing particular the dimmer channel).
Alternatively to delay / fade-in you may define delay down / fade down. This is common in the theater control when the value should be reduceded compared to the previous cue.
Please note that a cue by itself never "completes" but is always "overwritten" with a different cue.
| |
You have to clean the programmer! Otherwise nothing will happen, when you press the play button. More details will follow in the next chapter. |
Template:Bild mit Unterschrift

In following table we explain the meaning of cue attributes (which you can see in the scene list header):
| Attribute | Description | Example |
|---|---|---|
| Progress | shows the status of the scene during execution of scene list (wait time and progress) | in percent |
| Trigger | relation to predecessor cue, use "follow" as default | see Lesson 11 |
| Trigger Value | see Lesson 11 | |
| Name | free name of scene | should explain the content of cue |
| Fade | fade-in value | in milli seconds [ms] |
| Delay | fanning for fades | see Lesson 9 |
| Ac (active) | is this cue active or should it be ignored? | default: active |
| Ap (autoprepare) | Autoprepare - prepares certain channels for next cue (e.g. prepare correct position of clor wheel for next cue) | default: active |
| Re (ReExecute) | If ReExecute is active on a cue this cue takes all probably running fades and then it fades all of them with the selected fadetime from the actual value to the destination value. | Example: Cue 39 Fade 0s: 1 + 2 at full |
| Comment | for free use, insert explaining words |
In the same way you can create some more cues and store it in the scene list.
Template:Bild mit Unterschrift

Playing back cues
Go, Back, etc.
However you can also play a cue that is not in sequence by holding down CTRL and double clicking the cue you want to play.
Using advanced timing (=> Property Based Timing)
It is possible to set delay and fade times for each property individually. You can use this feature to build a cue that moves your moving lights to a different position, then change the color and after that change the gobo.
In the property grid, change "Values" to "Fade" or "Delay". You can now set fade or delay for each property. DMXControl expects time in milliseconds. Also you can use fanned values here. See Lesson 9.
The following example will immediately open the shutter and fade the intensity from 0 to 100% within 1 second (dimmer fade) after this 1 second (color delay) the color will be faded within 5 seconds (color fade). The total duration of this cue will be 6 seconds, because the longest action is the color fade: delay 1s + fade 5s.
Editing Property Based Timing
Once you saved a cue with property based timing you can edit the values: ... i guess should work but i don't know how.
Excercise
- Generate your own cues
- Try the buttons "STOP", "GO" and "Mode" in the cue list
- Work with different fade times
Certificate
I have understood the topics of this lecture and want to continue with next course: Lesson 9


