Overview
This chapter explains the installation of DMXControl 3. This is the standard installation. The current installation file can be found in the download section of the DMXControl homepage[1]
Installation Step by Step
The following screenshots describe the installation process step by step. Depending on the operating system and its language, some steps may slightly differ from those shown here.
Language
|
The installation wizard starts directly with the selection of the installation language. The dialog appears in the language set in the operating system, with the corresponding pre-selected entry. |
Welcome
|
On this screen, you will be informed about the software you are about to install. By clicking the [Next] button, you will reach the license dialog. |
License
|
The license dialog displays the end-user license of DMXControl 3 in both German and English. It outlines what the license includes, such as what the user is allowed to do with the software and what is not allowed. It is very important that this license agreement is accepted by clicking the [Picture_with_subtitleAccept] button, and you agree to it. By accepting, you make the agreement legally binding, even though it is free software. |
Install EasyView?
|
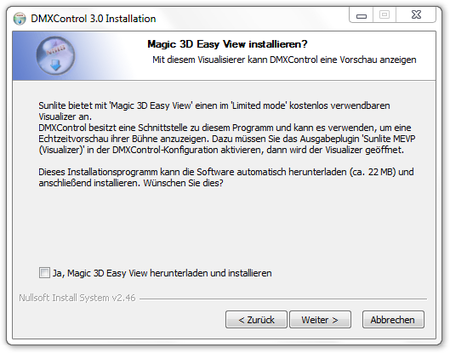
After accepting the license agreement, the question is asked whether the 3D visualizer 3D Easy View should be installed. On the home workstation, where the shows are prepared and the stage is simulated, the visualizer is a very useful tool. On the live laptop, which doesn't have as much 3D power as the desktop at home, the 3D display can be skipped. |
Target Directory
|
The next step is to select the target directory where DMXControl 3 should be installed. The default path is already suggested, which you can choose if you have no special preferences. The suggestion varies depending on the operating system, version, and language. On a German 32-bit Windows (XP, Vista, 7), the suggestion is "C:\Programme\DMXControl 3", while on the English 32-bit version, it is "C:\Program Files\DMXControl Picture_with_subtitle". On a 64-bit Windows, the suggestions are "C:\Programme (x86)\DMXControl 3" or "C:\Program Files (X86)\DMXControl 3". We chose a different installation folder (in our case "E:\DMXControl 3"). |
Program Features
|
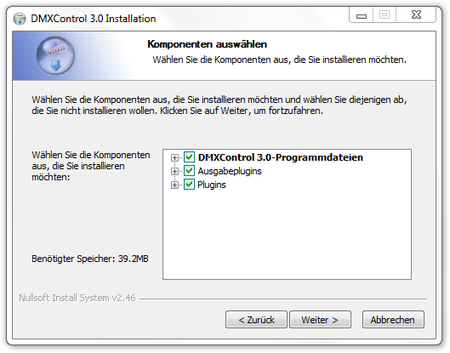
Now it’s time to select the details of the installation. In the standard installation, all features are selected, and you can proceed directly to the next step. However, if you want to perform a streamlined installation on a system, you can leave out certain features by unchecking them. Since DMXControl 3 doesn't take up much disk space, it is recommended to install it completely. |
Start Menu Folder
|
Finally, you will be asked for the name of the start menu entry. The default suggestion is DMXControl 3, but it can be adjusted later. |
Installation
|
The selected parts of DMXControl 3 are now decompressed and installed to the correct location. |
Download Easyview (optional)
|
If the option to install EasyView was selected, the download of the EasyView installation program will start. |
Install EasyView (optional)
|
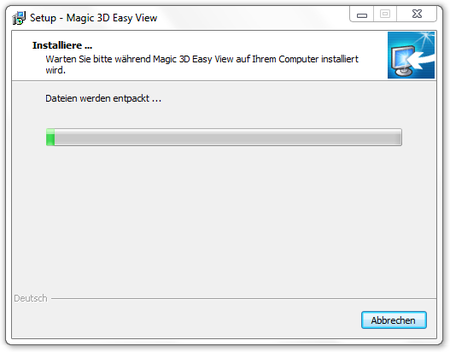
The EasyView installation starts automatically and does not require any direct user input. |
Install EasyView Drivers (optional)
|
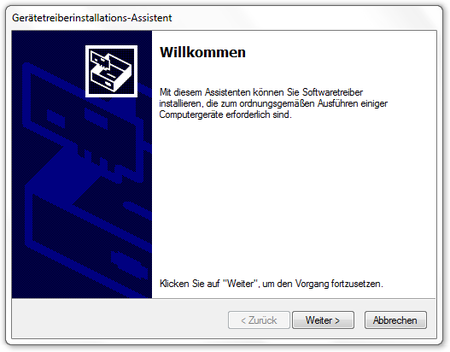
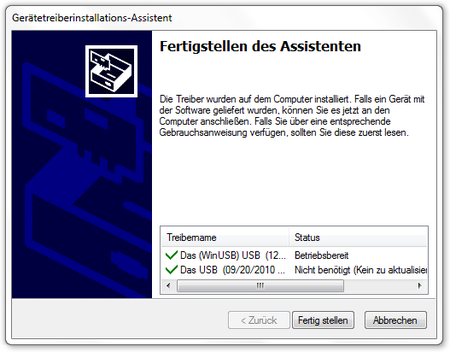
During the EasyView installation, drivers are installed on the system. At this point, the installation dialog for device drivers provided by Windows appears. This can simply be started by clicking the [Next] button. |
Complete EasyView Driver Installation (optional)
|
Once the drivers are successfully installed, this part can be finished and you will return to the EasyView installation wizard and then to the DMXControl 3 installation. |
Installation Complete
|
At the end of the installation, you have the opportunity to review the installation process. You will also see where EasyView has been installed. This path is important if you want to integrate additional fixtures into EasyView. Therefore, you should note the path if necessary. |
Start DMXControl
|
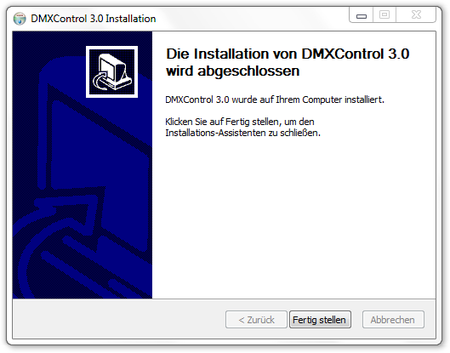
The installation completion is the final window of the installation routine. DMXControl 3 is now successfully installed on your computer. |
Links and References
Links
- ↑ DMXControl Homepage, download section: http://www.dmxcontrol.de/downloads/category/1-software.html


