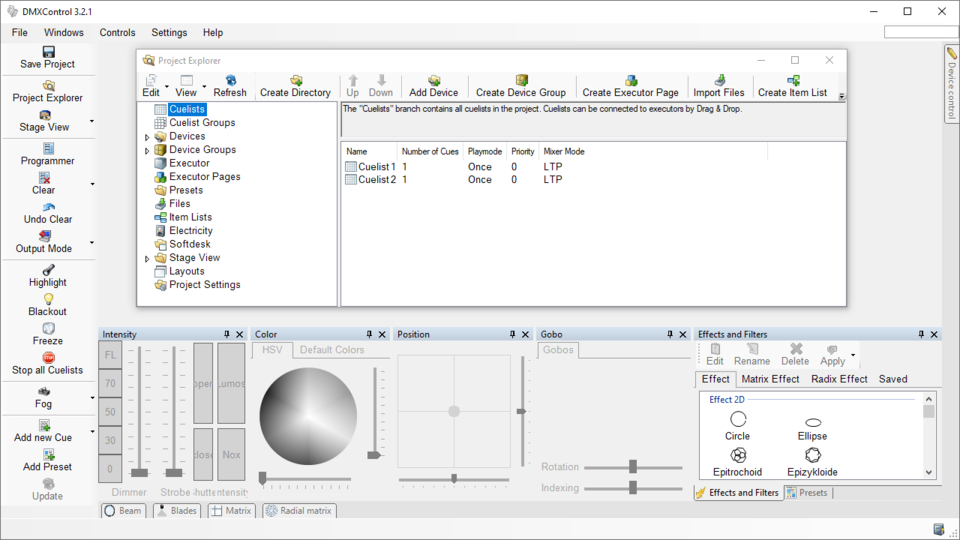
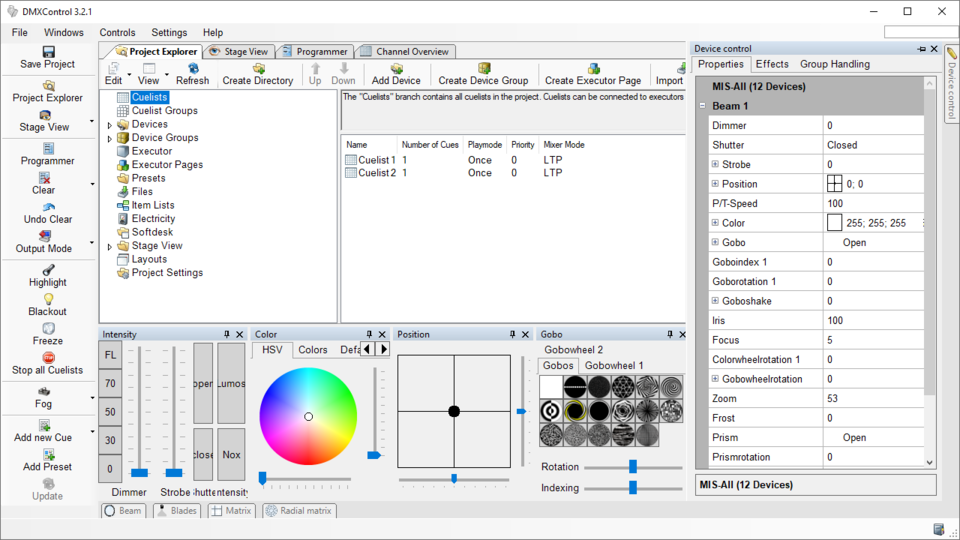
DMXControl 3 provides numerous windows that are needed more or less intensively depending on the current step in preparing a light show, etc. To create the best workspace for oneself, DMXControl 3 offers the Panel Concept, allowing users to freely arrange nearly all windows. You are not limited to the main window; you can also undock as many additional windows as needed to work effectively across multiple screens.

|
| Figure 1: Changing the window position of the project explorer. |
Overview
DMXControl 3 offers many functions divided into modules. To accommodate and organize these, each module has one or more panels with function-specific content. Since different panels are important for various use cases, DMXControl 3 has a flexible panel system. The modules in the user interface can be detached from the main window or anchored to the top, bottom, left, or right edges of a window. This flexibility allows for easy customization of the panel arrangement to suit personal needs, and modules can be moved to different screens if needed.
The panel concept is based on the DockPanel Suite by Weifen Luo. Further information can be found on the corresponding website[1] as well as on GitHub[2].
Key Features
Working with a Panel
A panel can house more than one module window. It is automatically created when more module windows are embedded in it. All windows are represented by a tab. Clicking on the tab displays the corresponding window.
There are several ways to detach a panel window from the main window to create a free-floating window:
- It is already detached upon creation.
- By double-clicking the blue or gray header of the window.
- By double-clicking the tab of an embedded window.
- By clicking and holding the left mouse button on the window header or tab, then dragging to the desired position.
| "Pane" means (window) pane. Since there is no suitable German term in computing, we use the terms "Pane" or "Panel" (frame element, input field, or console). |
Conditions for Arranging
A free-floating window can be dragged and docked anywhere at any time. Even within each free window, docking and splitting are possible.
- A "free" window is not anchored to any side.
- A "Pane" or Panel is a container for multiple windows.
- The icon with docking options indicates where a window can be docked. It is available both in the main window and in each panel. The position after docking is indicated by a blue rectangle.
- All windows are created by the operating system and can be closed via the [X] in the top-right corner. The [X] closes only the active window. If there are multiple windows in a panel, all other windows remain open.
- The vertical pushpin is the small icon that appears when a window is permanently displayed. Clicking on the pushpin hides this window, and it will only reappear when the associated icon at the screen edge is clicked.
- A panel can also be split into two different panels.
- Different windows can share a panel, with only the top one displayed. The others are hidden but visible through a tab.
Controls
Splitting a Panel
The cross-arrow is shown once you click and drag a panel out of its original position. According to the four directions of the arrows, the window will be split.

|
| Figure 2: Panel arrangement options. |
For more information, see the section Split fields horizontally or vertically.
Creating New Workspaces
You can create additional areas around the main workspace in three directions and position panels there. All windows assigned to these areas can be hidden and displayed only temporarily if desired.
| Icon | Description / Functionality |
|---|---|
| Inserts the current panel to the left. | |
| Inserts the current panel at the top. | |
| Inserts the current panel to the right. |
Usage
Permanent Window Division
Display Fields in Tabs (Pane sharing)
Instead of splitting into fields, two module windows can share a field. The displayed window can be selected using tabs. To share a field, drag a free window with the mouse pointer into the center of the displayed suggestions.
Thus, there are two ways to integrate another window into a field:
- Docking to one of the four sides
- Filling the empty space in the middle of the window
When multiple windows are dragged into a small field, small arrows appear on the left and right to make hidden tabs visible.
Changing the Order of Tabs
A panel can be moved by clicking the title bar or tab of the respective panel, holding the mouse pointer, and dragging it to the tab of another panel where the desired position for the panel should be. The new position is indicated by a bluish shading.

|
| Figure 5: Changing the order of the tabs. |
Splitting Fields Horizontally or Vertically
When a free window is dragged with the mouse pointer over a field, various docking options are available. It is possible to place both windows in one field, with each window taking up half of the field. This can be done horizontally or vertically.
If you want to arrange two windows, such as the Stage View below the Project Explorer, drag the Stage View window. A cross with several buttons will appear in the middle (see images 2 and 6). Now, drag the Stage View window to the bottom button of the cross and release it there. The view should now look as shown in image 7.

|
| Figure 6: Positioning the Stage View. |

|
| Figure 7: The main window now only contains the Project Explorer and the Stage View. |
Temporarily Displaying Windows
Hidden Windows (Hideaway Forms)
When you click the pushpin of a field (next to the [X] for closing), this panel is detached. The panel is "unpinned" and displayed as a tab at the edge of the screen. This is indicated by the horizontal pushpin. The remaining windows now share the newly gained space.
|
|
In the following example, there are five automatically hidden windows:
- on the right edge of the window, the Device Control as well as
- at the bottom of the window, the additional Control Panel for Beam, Blades, Matrix, and Radix.

|
| Figure 8: View with multiple hidden windows. |

|
| Figure 9: Device Control expanded. |
Auto-Hide
The dock window has an Auto-Hide feature that can be very useful. When a field is hidden, it is displayed at the outermost or bottom edge of the screen. Auto-Hide has three different modes:
- Hide: The panel is collapsed and visible only through the tab. This can be useful to display more information on the screen.
- Quick View: The panel briefly expands like a menu when you hover the mouse pointer over it. Once you move the mouse away from the panel, it automatically collapses.
- Expand: Clicking the tab or the panel content focuses on the panel, and it remains open until you click elsewhere in the interface.
Multi-Monitor Setup
The panel concept also supports working with multiple screens. In order for undocked panels to maximize on another monitor or minimize into the taskbar, the setting GUI must be adjusted to Show taskbar icon for floating windows set to "Yes". The default for this setting is "No". The following images show a direct comparison.
|
|
| If you want to work with multiple Softdesks in fullscreen mode, you must also enable the option Show taskbar icon for floating windows. This will also allow switching between Softdesks via the tabs in fullscreen mode. |
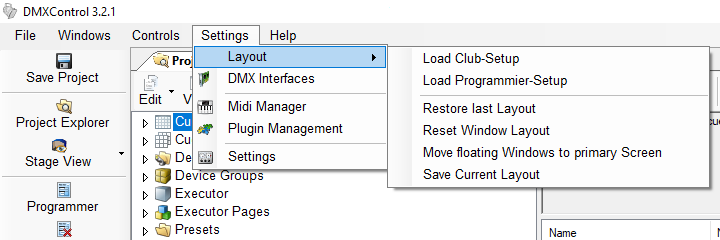
When working with multiple screens, it may happen that an undocked window is not visible, even though it is clearly open. To bring lost windows back into the display area of the main screen, use the following entry in the menu bar: « Settings »⇒ « Layout »⇒ « Move floating windows to primary screen » (see also image 13). This function moves all windows back to the main screen if you are working with only one screen or a completely different screen layout.
Working with Different Window Layouts
Saving a Window Layout
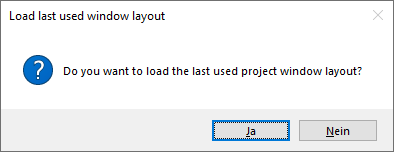
By default, DMXControl 3 saves the most recently used window arrangement in each project. This window layout in the project can be reloaded upon reopening. After loading a project, a prompt will appear asking if you would like to restore the saved layout in the project (see image 12).

|
| Figure 12: Layout prompt when opening a project |
In the « Settings »⇒ « Layout » menu, an individual layout configuration can also be saved. Clicking on the entry « Save current layout » allows you to give the layout a meaningful name in the following window. After that, the layout can be loaded.
Loading a Window Layout
All saved window layouts can be loaded through the main menu « Settings »⇒ « Layout »⇒ « Load... ». The following example shows two saved window layouts named Club Setup and Programming Setup.

|
| Figure 13: Project with different saved window layouts |
Resetting the Window Layout
The entry « Settings »⇒ « Layout »⇒ « Reset window layout » restores the current window layout to how it appeared after the first launch of DMXControl 3. This is described in the GUI article.
Links and References
- ↑ DockPanel Suite website: http://dockpanelsuite.com/
- ↑ DockPanel Suite on GitHub: https://github.com/dockpanelsuite/dockpanelsuite
